Drones can be a valuable addition to any STEM classroom as a fun, interesting and tactile way for students to engage in problem-solving. But having drones in the classroom isn’t just about the skills students can learn by flying them. It’s also about teaching students how to analyse and apply problem-solving skills to the data drones collect.
The problem with drone data
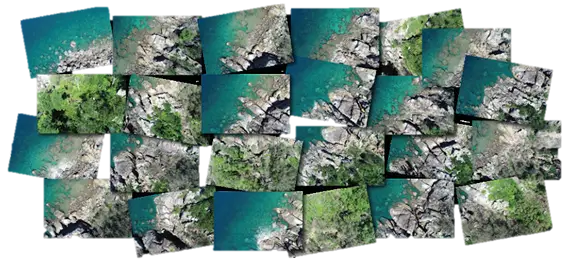
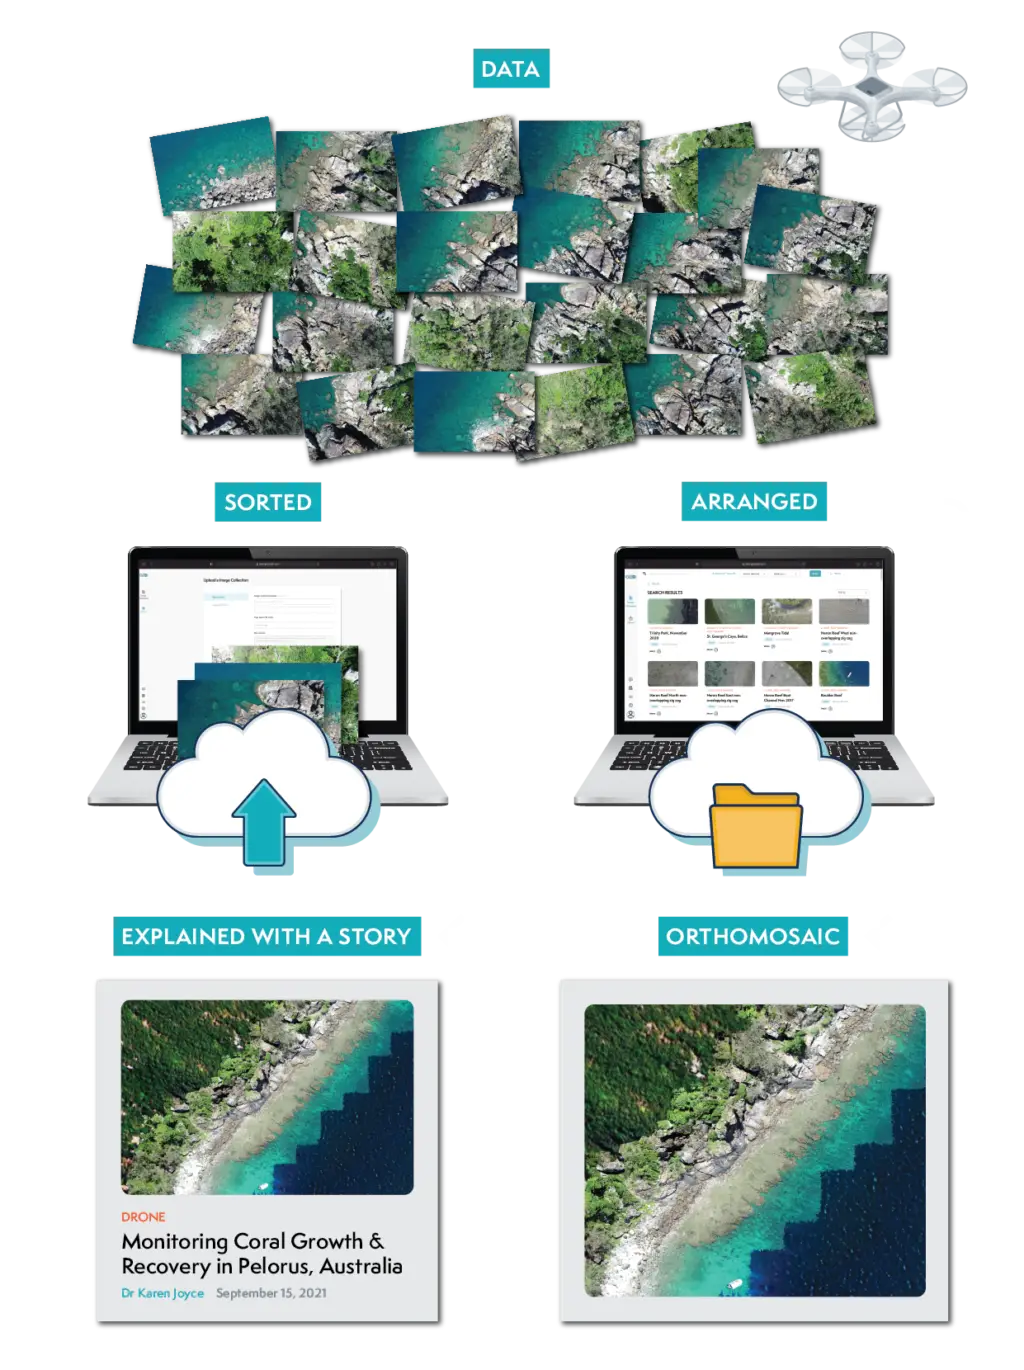
When drones fly mapping missions, they’re just taking lots of individual photos tagged with location metadata. These photos are what you’ll see when you go to download data from the drone.
While all of the interesting or important information that you mapped is there in the photos, they’re not very user-friendly to work with or learn from. Plus, in this raw format, these images can take up a lot of storage space, and be difficult to easily share between students.
So how can we get this data in a format where students can focus on high-level problem solving rather than just trying to get the data into a manageable format? One option is to upload drone data from your class mapping missions to GeoNadir.
Not familiar with drone mapping? Find free training resources on drone mapping and how to starthere.
What is GeoNadir?
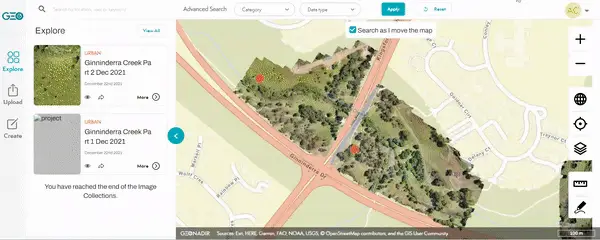
GeoNadir is a free online platform for sharing and storing drone mapping data. Using it is as simple as creating an account and uploading a dataset. There are lots of benefits to uploading your data to GeoNadir.
Free storage
GeoNadir offers free and secure storage for your drone mapping data, so you don’t have to worry about it cluttering up your or your student’s hard drives. Anyone can access it anywhere, anytime online.
Automatic orthomosaic generation
When you upload a dataset, the platform automatically generates an orthomosaic from the raw photos – one continuous image of the mapped area corrected for any distortions. Professionals commonly use orthomosaics, and students can learn from them more easily than raw images.
Easy sharing
Any dataset uploaded to GeoNadir is available and visible to anyone who visits the website. So sharing an orthomosaic is as simple as sharing a link.
In-built basic analysis with the create feature
Not only is sharing orthomosaics super-straight forward, the platform also has an in-built “create” feature. You can use it for labelling, measuring and highlighting different features of the orthomosaic, so students can start learning from the data straight away!
More options for in-depth dataset analysis are on the way
On top of all of the features currently available on the platform, there are also a range of new and exciting features currently in development that are prioritised for delivery in the next six months. These include:
A unique web mapping service link for each dataset so you can analyse your data in other programs like ArcGIS online
The ability to view your dataset in three dimensions with digital surface and terrain models
Downloadable orthomosaics, surface models and terrain models
The ability to make datasets private
How do I use GeoNadir to manage my drone data?
You can start using GeoNadir in 3 easy steps:
1. Create a profile
You can create a profile from the GeoNadir website or directly on the platform by clicking on the account icon in the top right corner of the screen. You can also link your account to your google account, or opt to have a passwordless login that just requires your email address.
2. Upload a dataset
Once you’ve logged in, click the upload button and follow the prompts to upload your dataset to the platform.
Make sure you include useful information in the title and tags of your dataset. Not only will this help you and your students remember the details of the mapping mission, it also makes it easier for other people to use and learn from your mapping mission.
Not sure what information to include with your dataset? Check out thisarticle for some ideas.
You can find the datasets you’ve uploaded by clicking on your account icon, or through the search function.
1. Start creating
With the create function, you can measure and annotate datasets to highlight important features or collect quantitative information from your drone data. Get started by searching for a dataset you’re interested in. Once you’ve toggled the orthomosaic so it’s visible on the map, click the “create” button.
From there you can add and edit whatever features you’d like to the orthomosaic. You can read in more detail how to use the create function here.
Currently, you can not save or export layers from the create function, so you’ll need to screenshot anything you create so you don’t lose it. The ability to save layers to a project folder is coming soon though, so be on the lookout!
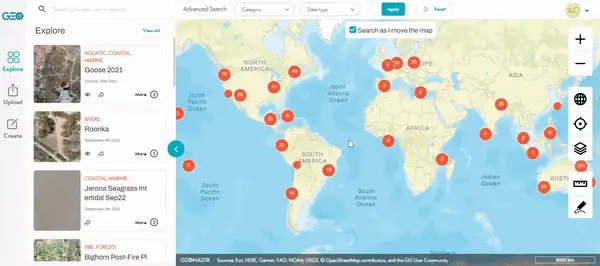
Access drone data from around the world
GeoNadir isn’t just a useful platform for the storage and analysis of drone data that your class has collected. Researchers and other professionals upload datasets to GeoNadir from all over the world.
Students can use these datasets to learn about how drones are being applied to solve real-world problems. You can read the stories behind some of these datasets on the Stories from Above blog on the GeoNadir website.
Getting started with drone mapping
We have a teacher professional learning course that will take you through how to use sub 2kg drones to conduct a drone mapping mission.
This course is available inside the She Maps Membership. Click here to get started.
Check out some of our previous articles on using drones in the classroom, their benefits, plus answers to some common concerns:
She Maps is Australia’s leading expert in drone and geospatial education.
She Maps assist schools with the purchasing of drones, school-industry created drone and geospatial teaching resources and highly supportive teacher professional development.
FREE eBook – How to start a drone program at your school – Teachers Guide – Download Now
Learning Solutions Guide – Programs, Products and Pricing Guide – Read now
Ready to buy drones for your school? Browse our convenient classroom kits!
You’re in Safe Hands!
She Maps is a CASA approved commercial operator to fly microdrones indoors with students and teachers. CASA holds commercial operators, to a higher standard than recreational users and educators. This means that She Maps has been assessed by CASA as having rigorous training and risk mitigation procedures in place.
Want some help?
Schedule a call with one of our team members to get some personalised recommendations.
Take our resources for a spin and join the thousands of teachers who love our ready-to-teach classroom materials. Try one of our complete units of work for free.